How I became 3x more productive in 30 minutes with Cursor
(I’m not affiliated with cursor, I just think it’s just a great tool)
Let me explain…
I’ve been using VS Code for quite a while now, before Notepad.exe, Notepad++ and Sublime. Switching to VS Code was a big step, but I’ve never looked back. It provides a pleasent coding experience, has a lot of extensions, and just runs everywhere (with ok performance). But most importantly, it gets the job done with the least amount of friction.
That was until LLMs entered the chat (🥁). With the new techonology I found myself, as many others, using it to generate code and help me through various coding tasks. However, there was always this friction of going back and forth between ChatGPT, my IDE and the internet. And this is how I came to use Cursor.
Cursor just encapsulates my behaviour into the editor, but still feels like native VS Code. It makes me feel 10x more efficient, but I guess it’s closer to 3x. Let me show I use it and why I think you should give it a spin if you’re a productivity fanatic like me.
But first, what is Cursor anyway? They call it the “AI Code Editor. Built to make you extraordinarily productive, Cursor is the best way to code with AI.”
I like to call it a VS Code fork with built-in prompting and chatting with your code.
How I use it
If you’re just here for the nuggets, you can skip to the Tips & Tricks section.
-
Stay in context when prompting
No more context switching between ChatGPT and your IDE just to copy-paste generated code. This has been the single most unlock for me. -
Understand code not written by you
(or by yourself 6 months ago, same same) Onboarding, new PRs or just cloning some random repository can be hard to understand -
Data exploration
Creating Jupyter notebooks and plotting results with matplotlib. Sepcifically this pattern has felt a bit magical. Turning heaps of data into visualiations very quickly has taught me a lot too. -
Light first pass review
Find issues that are easily glanced over like typos, performance & security ones. Has saved me (and more importantly my team) a lot of time -
Writing tests
I guess this is a very common use case for generating code at this point, but it becomes very straight forward when using cursor. -
Writing this 🤷
It’s neat for writing content, just like this. Get immediate feedback on your writing. You don’t need a fancy writing tool to do this.
3 simple features
This is all possible with these 3 little things:
- In place prompting with
CMD+K(if I could only have one, this is it) @for indexing files & documentation- Chatting with
CMD+L
Setup & Installation
The setup is very simple. Just download and install from the official website. You should feel very familiar with the interface since it’s a VS Code fork (if that’s what you’re used to).
BYOK or Subscription
You can either bring your own key or get on the paid cursor plan. Personally, I’m very satisfied with just using my own key, but I’m tempted to try the paid plan to get access to Copilot++. Also very happy with Supermaven right now.
It’s worth noting that BYOK might not be the cheapest option. Last month I racked up $35 from Cursor alone, and one day into June I’m at $2. YMMV.
Models
I’m using whatever the current SOTA (state of the art) model is for all my cursor usage. This is just to make sure I’m getting the best possible experience.
Get started with prompting
You got your cursor installed and ready to go. Now let’s get started with prompting. Open up a file you want to edit and press CMD+K. This is what you’ll see:
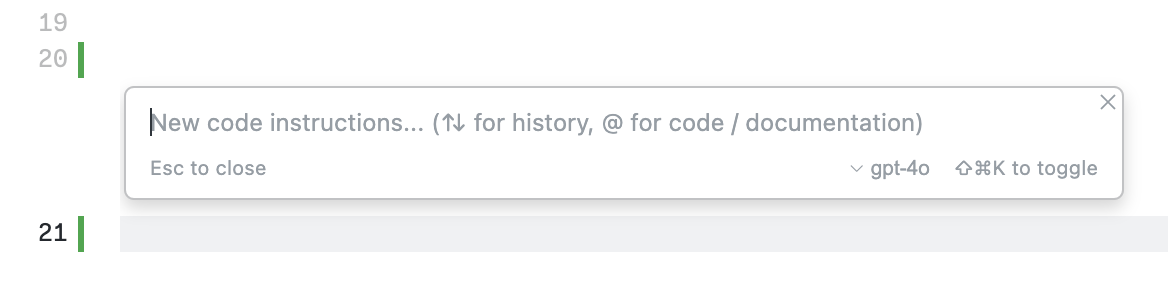
In this box is where most of the work will happen. Highlight the code or text you want to change, then hit CMD+K and prompt away! Just describe the change you want to make and let the LLM do the rest.
Reference Code
You can also guide the LLM with references to code or documentation.
Open up the prompt and press @. With the @ symbol you can reference pretty much anything. What is particularly useful is to reference variables, functions or other files. Let’s look at an example:
We have this code
def parse_line(line: str):
  words = line.split()
  reversed_words = words[::-1]
  uppercased_words = [word.upper() for word in words]
  return f"line: {words}, reversed: {reversed_words}, uppercased: {uppercased_words}"


def process_file(file_path: str):
  with open(file_path, 'r') as file:
    # Perform file operations here

process_file('path_to_file')
Now we press CMD+K and enter the following prompt:
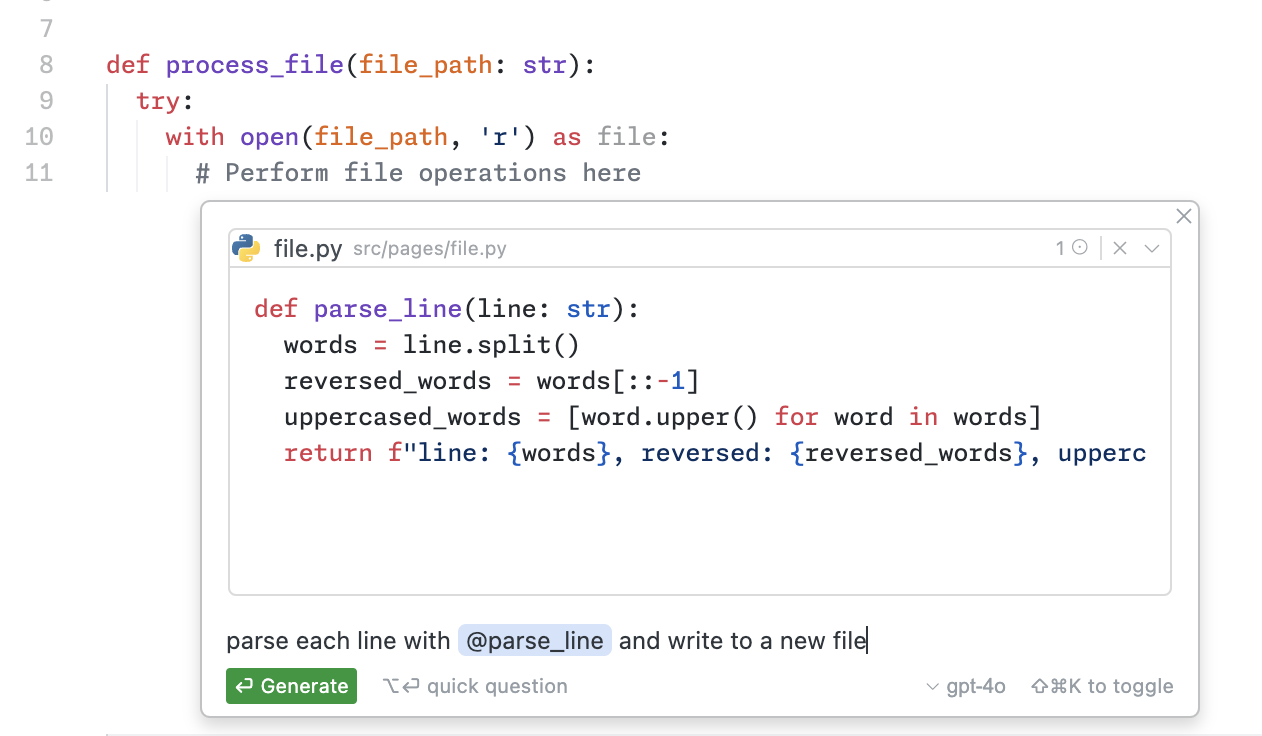
Using this prompt, we’ll get this code:
def parse_line(line: str):
  words = line.split()
  reversed_words = words[::-1]
  uppercased_words = [word.upper() for word in words]
  return f"line: {words}, reversed: {reversed_words}, uppercased: {uppercased_words}"

def process_file(file_path: str):
  with open(file_path, 'r') as file:
    with open('parsed_' + file_path, 'w') as output_file:
      for line in file:
        parsed_line = parse_line(line)
          output_file.write(parsed_line + '\n')

process_file('path_to_file')
You can do this with any file, variable or function. Any symbol really.
Index Documentation
What is even more useful is to index documentation that’s not already indexed by cursor. This can be any website on the internet, and for this example we’ll use Drizzle ORM since the LLMs don’t know it too well.
Start by hitting CMD+K and typing @ to index the documentation
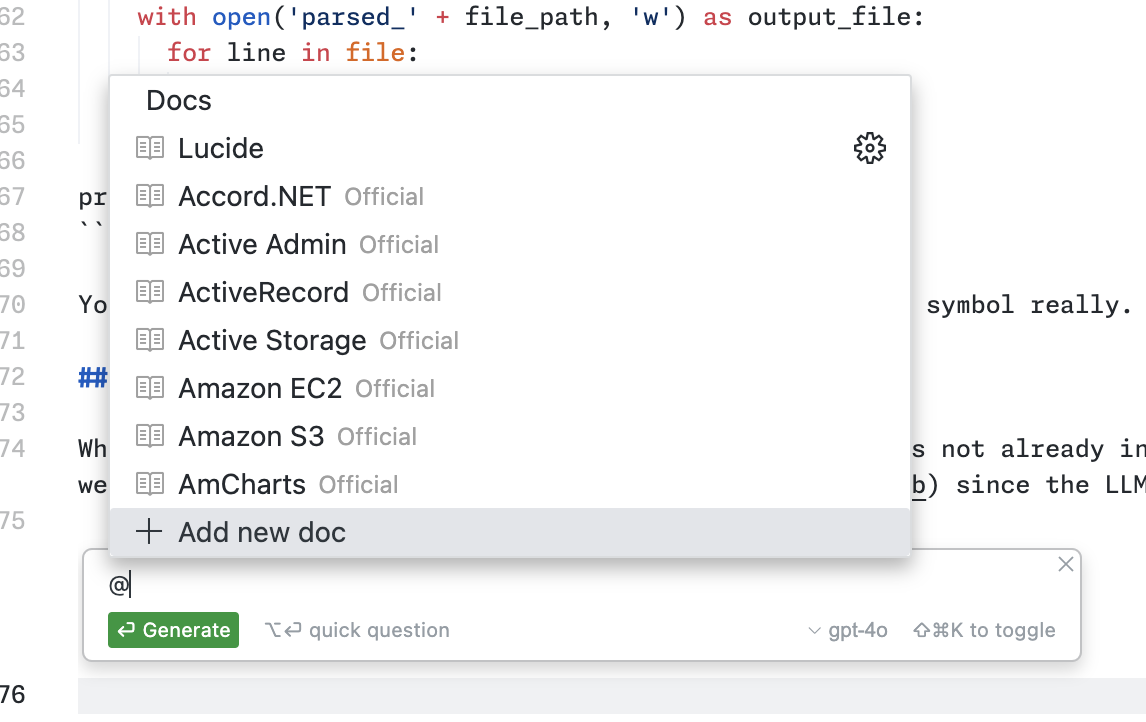
You’ll be prompted to enter a URL and name for the documentation. After you’ve done that, you’ll get a list of all the documentation you’ve indexed
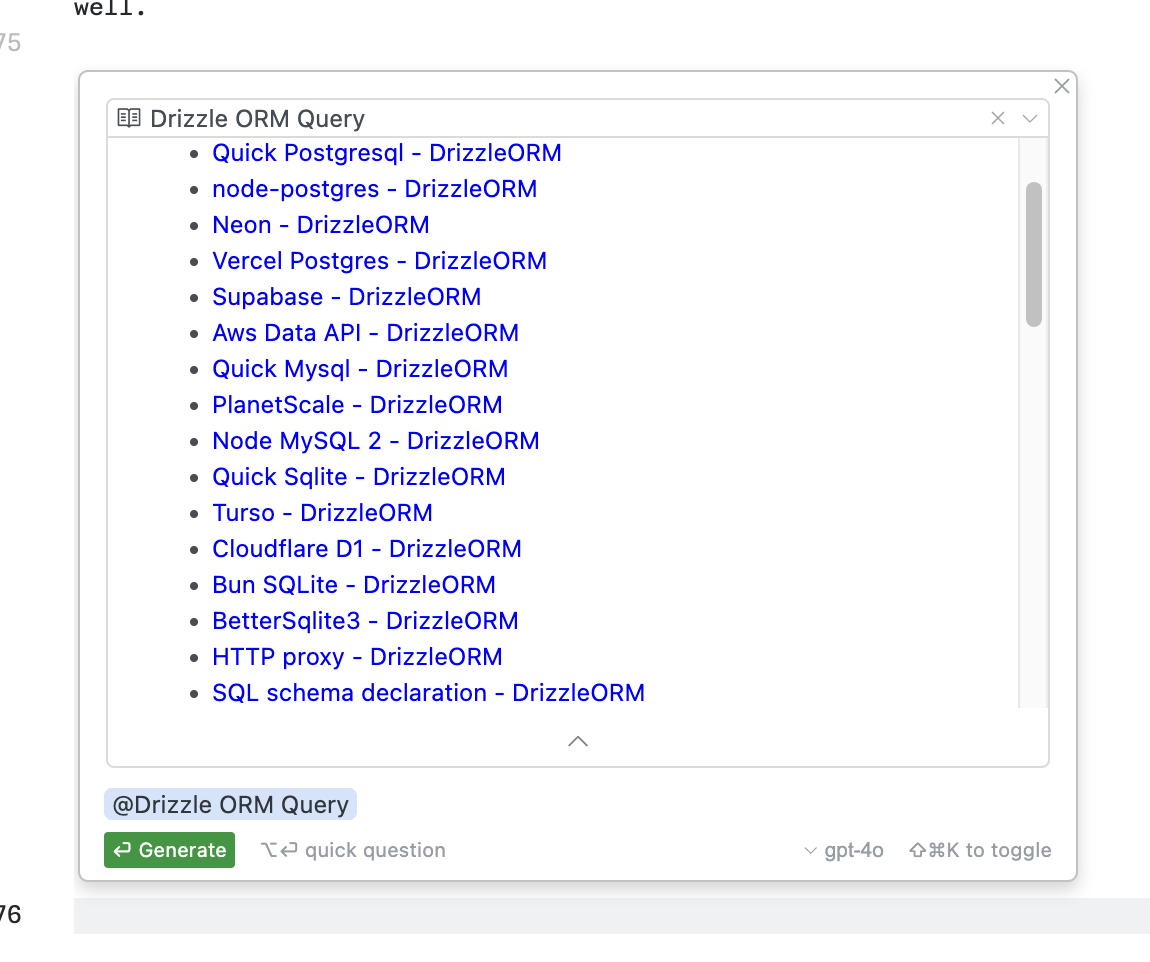
Now you can use the @ symbol to reference the documentation you’ve indexed
Chat with your code
The CMD+L command is a great way to chat with your code base. This is especially useful when you’re working on a large codebase and you want to get a quick answer to a question.
Interpreter Mode
There’s this thing called interpreter mode that supposedly can run commands and do operations for you (like CMD+K). It seems to be a paid feature only, so haven’t been able to try it out yet.
Tips & Tricks
Here are some flows that I’ve found useful. I’ll be adding more as I discover them
- Highlight text →
SHIFT+CMD+Lto quickly chat with selected text - Highlight text →
CMD+Kto quickly edit code CMD+K→ Write prompt →OPTION+ENTERto ask about selectionCMD+K→ Write prompt →SHIFT+CMD+Kto switch between prompt and code- Write code → Create test file →
CMD+K→@file-with-codeand ask to write test
Conclusion
This is one of the few tools that has really augmented my productivity and experience, that’s why I’m so bullish on it. There’s probably a lot more to it, so I encourage you to play around with it and make it your own.
There’ll be more posts about producitivity tools, so stay tuned!
Need any help with anything? Reach out on email or X, happy to help :)